What Does a $21,000 DIY Home Theater Look Like?
AI-generated, human-reviewed.
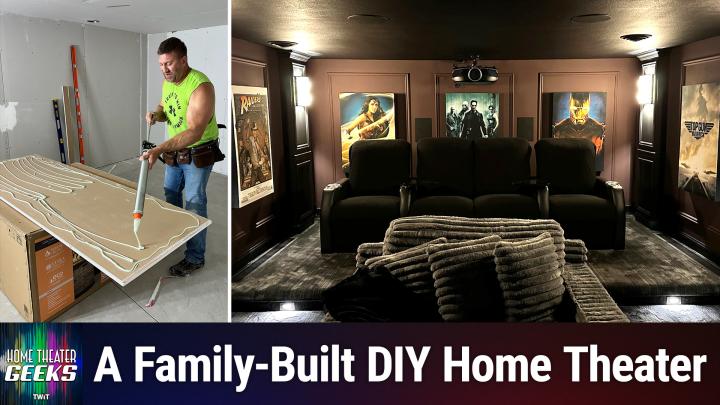
Building your own dedicated home theater can seem overwhelming, but with detailed research, careful planning, and some sweat equity, you can enjoy a cinematic experience at home for far less than hiring a custom installer. On Home Theater Geeks, Scott Wilkinson and guest Jeremy Mills break down the full process, from soundproofing and framing to equipment selection and finishing touches, showing what works (and what to avoid) when creating a DIY theater that rivals commercial cinemas.
A custom home theater doesn't have to cost six figures. By leveraging online resources, savvy shopping, and a methodical approach, you can get expert-level audio and video performance in your basement or spare room. Jeremy Mills achieved a high-performance space for around $21,000, doing nearly all labor himself, with results the whole family loves.
Planning Your DIY Home Theater: First Steps
- Location matters: Choose a room (often a basement) where you can control light, sound, and layout. Basements are ideal for their blank-slate potential and inherent sound isolation.
- Define priorities: Decide if you're optimizing for video, audio, or overall versatility. In this build, the focus was on picture quality and immersive surround sound, with strong attention to soundproofing due to a young child in the home.
- Research extensively: Use free online resources such as AVS Forum, YouTube tutorials, and expert advice from communities that have already solved home theater problems. Learning from others’ mistakes can save significant money and headaches.
- Budget realistically: Carefully track every expense, including building materials, equipment, and tools. Plan for about a year of construction if working in your spare time.
How to Build: Materials, Techniques, and Smart Shopping
Soundproofing and Isolation
- Double-Layer Drywall with Green Glue: Using two layers of 5/8" drywall with Green Glue acoustic caulk between them provides mass and vibration damping. This effectively reduces sound leakage, important for late-night viewing or protecting nearby bedrooms.
- Hat Channels and Isolation Clips: These decouple walls and ceilings from the house structure, stopping sound from traveling through shared surfaces.
- Insulation: Fill walls and ceilings with insulation for additional sound control. Strategic use of duct mufflers in HVAC prevents sound from traveling through vents.
- Professional Work Where Needed: Hiring electricians for dedicated circuits and professionals for drywall mudding and carpet installation ensures safety and a professional finish.
Visual Planning
- Screen Size & Positioning: Use PVC pipes or tape on walls to visualize your target screen size and seating layout before building.
- Seating and Viewing Distance: Map out the main viewing "sweet spot" for immersive field-of-view. Use tools like a temporary chair to test placement.
Audio System & Acoustic Treatment
- Speaker Enclosures: Build or use isolation boxes for in-wall or ceiling speakers to prevent rattling and sound leakage.
- Multiple Subwoofers: Including both traditional subwoofers and in-column woofers helps smooth out bass response throughout the room.
- Acoustic Panels: Handmade movie posters double as sound absorbers, using rigid fiberglass (Owens Corning 703) for first reflection points and back wall coverage. Adding an air gap between panel and wall increases absorption.
- Carpet and Soft Furnishings: Thick, plush carpet significantly reduces reverb and adds comfort.
Finishing Touches
- Lighting: Simple dimmers or step lights (no need for expensive control systems) give atmosphere and safety.
- Color Choices: Dark, low-sheen paints minimize light reflections and boost perceived contrast. A black ceiling is especially effective.
- Functional Decor: Incorporate family preferences into color and poster selections for a personal touch.
Key Points to Remember
- Thorough Research Pays Off: Years of reading, planning, and learning online saved thousands compared to purely hiring out the build.
- Buy Once, Cry Once: Invest in quality where it counts (like HDMI cables run in walls, or acoustic materials), and avoid redoing work.
- Soundproofing Is Non-Negotiable: For true home theater enjoyment, especially with family nearby, prioritize proper sound isolation early in the build.
- DIY Is Practical for Most Stages: Nearly all framing, drywall, paint, and final assembly can be done with basic tools and online guidance; leave specialty tasks to the pros.
- Immersive Results Are Achievable on a $21,000 Budget: The finished room rivals many commercial theaters for picture, sound, and comfort, thanks to methodical preparation and family teamwork.
- Equipment flexibility: Many AV receivers and speakers can be found at discounts, and you can start with existing equipment and upgrade later.
If you’ve been hesitant to start a home theater project, this episode proves the process is manageable, especially with the wealth of available resources and support online. Customize your build for your family's needs, choose priorities that fit your budget, and focus on the fundamental elements: soundproofing, acoustics, screen and seating placement, and reliable gear. A DIY home theater is within reach for many enthusiasts, even without professional construction experience. With a clear plan, hands-on help, and willingness to learn, you can enjoy a transformative movie experience at home and tailor your space to your liking—all while saving tens of thousands compared to hiring it out.
Curious about more home theater builds, tech tips, and honest reviews? Subscribe for new Home Theater Geeks episodes:
https://twit.tv/shows/home-theater-geeks/episodes/538